新版spring security配置跨域无效
使用的spring boot+vue
为什么这样配置还是不行呢?
@Configuration
public class SecurityConfig {
    //省略.....

    @Bean
    SecurityFilterChain filterChain(HttpSecurity http) throws Exception {
        // 省略...
        http.csrf(csrf -> csrf.disable());
        http.cors(cors -> cors.configurationSource(configurationSource()));
        http.addFilterAt(loginFilter(), UsernamePasswordAuthenticationFilter.class);
        return http.build();
    }

    @Bean
    CorsConfigurationSource configurationSource() {
        CorsConfiguration corsConfiguration = new CorsConfiguration();
        corsConfiguration.setAllowedHeaders(Collections.singletonList("*"));
        corsConfiguration.setAllowedMethods(Collections.singletonList("*"));
        corsConfiguration.setAllowedOrigins(Collections.singletonList("*"));
        corsConfiguration.setMaxAge(3600L);
        UrlBasedCorsConfigurationSource source = new UrlBasedCorsConfigurationSource();
        source.registerCorsConfiguration("/**", corsConfiguration);
        return source;
    }
}
这是提交登录之后:

- 帮你找了个相似的问题, 你可以看下: https://ask.csdn.net/questions/221512
- 你也可以参考下这篇文章:spring security安装以及查看或修改默认登录的账号密码
- 您还可以看一下 银文杰老师的Spring Security 实战精讲——基础篇课程中的 代码详细解读:自定义投票者(1)小节, 巩固相关知识点
- 除此之外, 这篇博客: 使用Spring Security实现自定义登录页面及相关配置中的 示例: 部分也许能够解决你的问题, 你可以仔细阅读以下内容或跳转源博客中阅读:
1.工程结构

1.1.它们三个可官网下载:
我的百度网盘:
链接:https://pan.baidu.com/s/17TzgQX0OVSef49aAawXf6w
提取码:0mqm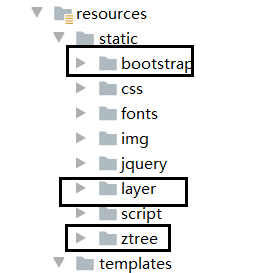
1.2.主启动类 CrowdManagerApplication.java: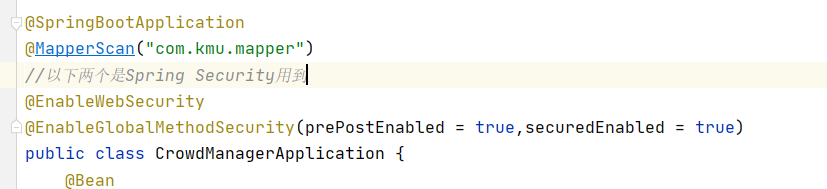
2.Spring Security的依赖:
<dependency>
        <groupId>org.springframework.boot</groupId>
        <artifactId>spring-boot-starter-security</artifactId>
</dependency>
3.CrowdConfig.java:
@Configuration
@EnableWebSecurity
public class CrowdConfig extends WebSecurityConfigurerAdapter {

    //执行权限配置,如:为指定资源分配权限,开放无需权限的资源等
	@Override
	protected void configure(HttpSecurity http) throws Exception {
	    //父类中默认进行了配置,我们将其拿到子类,按照自己的需求进行修改
	    http
	            .authorizeRequests()//进行权限设置
	            .anyRequest()//任何请求
	            .authenticated()//进行认证
	            // 这是ant语法,表示向后退一步,回到HttpSecurity位置的那一个级别,
	            // 可以认为是使用这种方式实现HttpSecurity对象通过连续调用方法实现配置,
	            // 每进行一个板块的配置完毕,则向后退一步回到HttpSecurity位置
	            .and()
	            .formLogin()//设置表单登录,后续可以在这里修改自定义登录页面
	            .loginPage("/login.html") //设置自定义的登录页面

	            //指定处理登录请求的路径,对应form表单的action地址
	            .loginProcessingUrl("/login").permitAll()
	            //设置接收表单提交的用户name,默认为username
	            .usernameParameter("account")
	            //设置接收表单提交的用户密码,默认为password
	            .passwordParameter("password")
	            //指定权限认证失败跳转的错误页面
	            .failureUrl("/login.html?login=error")
	            //直接访问登录页面时返回的地址,如果访问的是登录页的话返回指定的地址
	            .defaultSuccessUrl("/main.html",true)
	            //指定退出登录URL
	            .and().logout().logoutUrl("/logout")
	//           .logoutSuccessUrl("http://baidu.com") 设置退出后跳转的路径
	            .and().csrf().disable() //禁用csrf功能,这里暂时用不到
	    ;
	}

    //设置不需要权限认证的资源
    @Override
    public void configure(WebSecurity web) throws Exception {
        web.ignoring().antMatchers("/kaptcha","/bootstrap/**","/css/**",
                "/fonts/**","/img/**","/jquery/**","/script/**","/ztree/**","/layer/**");
    }
}
自定义登录页面:
4.login.html:
注:部分代码省略
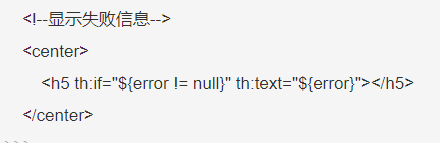
<div class="container">
    <form class="form-signin" role="form" th:action="@{/login}" method="post">
        <h2 class="form-signin-heading"><i class="glyphicon glyphicon-log-in"></i> 管理员登录</h2>
        <div class="form-group has-success has-feedback">
            <input name="account" type="text" class="form-control" id="account" placeholder="请输入登录账号" autofocus>
            <span class="glyphicon glyphicon-user form-control-feedback"></span>
        </div>
        <div class="form-group has-success has-feedback">
            <input name="password" type="password" class="form-control" id="password" placeholder="请输入登录密码"
                   style="margin-top:10px;">
            <span class="glyphicon glyphicon-lock form-control-feedback"></span>
        </div>
        <div class="form-group has-success has-feedback">
            <img src="/kaptcha">
            <button id="refresh" class="btn btn-success"><i class="glyphicon glyphicon-refresh"></i></button>
            <input name="code" type="text" class="form-control" id="code" placeholder="请输入验证码"
                   style="margin-top:10px;">
            <span class="form-control-feedback"></span>
        </div>
        <div class="checkbox">
            <label>
                <input type="checkbox" name="remember-me"> 记住我
            </label>
            <br>
        </div>
        <input type="submit" value="登录" class="form-control btn-success">
    </form>
    <!--显示失败信息-->
    <center>
        <h5 th:if="${error != null}" th:text="${error}"></h5>
    </center>
在页面中显示用户信息:

5.ManagerController.java://springsecurity,在页面中显示用户信息 @GetMapping("/main.html") public String main(HttpSession session){ //获取用户信息,存放到session域中 SecurityContextImpl securityContextImpl =(SecurityContextImpl)session.getAttribute("SPRING_SECURITY_CONTEXT"); Authentication authentication = securityContextImpl.getAuthentication(); //将主体转为用户详情对象 UserDetails userDetails =(UserDetails)authentication.getPrincipal(); String username = userDetails.getUsername(); session.setAttribute("username",username); return "main"; }6.common.html模板中:

<div id="navbar" class="navbar-collapse collapse">
            <ul class="nav navbar-nav navbar-right">
                <li style="padding-top:8px;">
                    <div class="btn-group">
                        <button type="button" class="btn btn-default btn-success dropdown-toggle" data-toggle="dropdown">
                            <i class="glyphicon glyphicon-user"></i>[[${session.username}]] <span class="caret"></span>
                        </button>
                        <ul class="dropdown-menu" role="menu">
                            <li><a href="#"><i class="glyphicon glyphicon-cog"></i> 个人设置</a></li>
                            <li><a href="#"><i class="glyphicon glyphicon-comment"></i> 消息</a></li>
                            <li class="divider"></li>
                            <li><a th:href="@{/logout.do}"><i class="glyphicon glyphicon-off"></i> 退出系统</a></li>
                        </ul>
                    </div>
                </li>
                <li style="margin-left:10px;padding-top:8px;">
                    <button type="button" class="btn btn-default btn-danger">
                        <span class="glyphicon glyphicon-question-sign"></span> 帮助
                    </button>
                </li>
            </ul>
            <form class="navbar-form navbar-right">
                <input type="text" class="form-control" placeholder="查询">
            </form>
        </div>
实现退出功能:
当点击退出时,应清除掉用户在session中的信息,并且跳转到非权限校验的页面,如:登录页面。
7.common.html模板中:
8.错误提示:ManagerController.java中
9.ManagerController.java控制层中:
没有过多的前端调试,只为实现其功能@GetMapping("/login.html") public String tologin(HttpServletRequest request,Model model){ //String cr = request.getParameter("codeerror"); // if(cr !=null){ // model.addAttribute("error","验证码输入错误!请重试"); // } String lo = request.getParameter("login"); if(lo !=null){ model.addAttribute("error","帐号或密码错误,登录失败!请重试"); } return "login"; }9.login.html中:
10.application.yml配置文件中:
spring:
  datasource:
    driver-class-name: com.mysql.jdbc.Driver
    url: jdbc:mysql://localhost:3306/kmu_crowd?characterEncoding=utf8
    username: root
    password: root
11.pom.xml文件中:
<?xml version="1.0" encoding="UTF-8"?>
<project xmlns="http://maven.apache.org/POM/4.0.0" xmlns:xsi="http://www.w3.org/2001/XMLSchema-instance"
         xsi:schemaLocation="http://maven.apache.org/POM/4.0.0 https://maven.apache.org/xsd/maven-4.0.0.xsd">
    <modelVersion>4.0.0</modelVersion>
    <groupId>com.kmu</groupId>
    <artifactId>crowd-manager</artifactId>
    <version>0.0.1-SNAPSHOT</version>
    <name>crowd-manager</name>
    <description>Demo project for Spring Boot</description>

    <properties>
        <java.version>1.8</java.version>
        <project.build.sourceEncoding>UTF-8</project.build.sourceEncoding>
        <project.reporting.outputEncoding>UTF-8</project.reporting.outputEncoding>
        <spring-boot.version>2.3.0.RELEASE</spring-boot.version>
    </properties>

    <dependencies>
        <!-- https://mvnrepository.com/artifact/com.github.penggle/kaptcha -->
        <dependency>
            <groupId>com.github.penggle</groupId>
            <artifactId>kaptcha</artifactId>
            <version>2.3.2</version>
        </dependency>
        <dependency>
            <groupId>org.springframework.boot</groupId>
            <artifactId>spring-boot-starter-security</artifactId>
        </dependency>

        <dependency>
            <groupId>cn.hutool</groupId>
            <artifactId>hutool-all</artifactId>
            <version>5.3.7</version>
        </dependency>

        <!--mybatisPlus-->
        <dependency>
            <groupId>com.baomidou</groupId>
            <artifactId>mybatis-plus-boot-starter</artifactId>
            <version>3.3.2</version>
        </dependency>

        <dependency>
            <groupId>org.springframework.boot</groupId>
            <artifactId>spring-boot-starter-data-jdbc</artifactId>
        </dependency>
        <dependency>
            <groupId>org.springframework.boot</groupId>
            <artifactId>spring-boot-starter-jdbc</artifactId>
        </dependency>
        <dependency>
            <groupId>org.springframework.boot</groupId>
            <artifactId>spring-boot-starter-thymeleaf</artifactId>
        </dependency>
        <dependency>
            <groupId>org.springframework.boot</groupId>
            <artifactId>spring-boot-starter-web</artifactId>
        </dependency>

        <dependency>
            <groupId>org.springframework.boot</groupId>
            <artifactId>spring-boot-devtools</artifactId>
            <scope>runtime</scope>
            <optional>true</optional>
        </dependency>
        <dependency>
            <groupId>mysql</groupId>
            <artifactId>mysql-connector-java</artifactId>
            <scope>runtime</scope>
            <version>5.1.38</version>
        </dependency>
        <dependency>
            <groupId>org.projectlombok</groupId>
            <artifactId>lombok</artifactId>
            <optional>true</optional>
        </dependency>
        <dependency>
            <groupId>org.springframework.boot</groupId>
            <artifactId>spring-boot-starter-test</artifactId>
            <scope>test</scope>
            <exclusions>
                <exclusion>
                    <groupId>org.junit.vintage</groupId>
                    <artifactId>junit-vintage-engine</artifactId>
                </exclusion>
            </exclusions>
        </dependency>
    </dependencies>

    <dependencyManagement>
        <dependencies>
            <dependency>
                <groupId>org.springframework.boot</groupId>
                <artifactId>spring-boot-dependencies</artifactId>
                <version>${spring-boot.version}</version>
                <type>pom</type>
                <scope>import</scope>
            </dependency>
        </dependencies>
    </dependencyManagement>

    <build>
        <plugins>
            <plugin>
                <groupId>org.apache.maven.plugins</groupId>
                <artifactId>maven-compiler-plugin</artifactId>
                <configuration>
                    <source>1.8</source>
                    <target>1.8</target>
                    <encoding>UTF-8</encoding>
                </configuration>
            </plugin>
            <plugin>
                <groupId>org.springframework.boot</groupId>
                <artifactId>spring-boot-maven-plugin</artifactId>
            </plugin>
        </plugins>
        <resources>
            <resource>
                <directory>src/main/java</directory>
                <includes>
                    <include>**/*.xml</include>
                </includes>
            </resource>

            <resource>
                <directory>src/main/resources</directory>
                <filtering>true</filtering>
                <excludes>
                    <exclude>**/*.woff</exclude>
                    <exclude>**/*.woff2</exclude>
                    <exclude>**/*.ttf</exclude>
                </excludes>
            </resource>
            <resource>
                <directory>src/main/resources</directory>
                <filtering>false</filtering>
                <includes>
                    <include>**/*.woff</include>
                    <include>**/*.woff2</include>
                    <include>**/*.ttf</include>
                </includes>
            </resource>
        </resources>
    </build>
</project>
如有遗漏,敬请谅解
如果你已经解决了该问题, 非常希望你能够分享一下解决方案, 写成博客, 将相关链接放在评论区, 以帮助更多的人 ^-^
引用ChatGPT作答:
如果你在Vue应用中访问后端Java API时遇到了"CORS policy"错误,请按照以下步骤尝试解决:
在后端Java应用的接口上添加CORS支持。你可以使用Spring框架的
@CrossOrigin注解来实现。在需要支持跨域的Controller类或方法上添加该注解,并设置允许访问的域名。import org.springframework.web.bind.annotation.*; @RestController @CrossOrigin(origins = "http://localhost:8085")或者@CrossOrigin(origins = "*") public class YourController { @GetMapping("/your-api-endpoint") public String yourApiMethod() { // 你的业务逻辑 return "Response"; } }这样设置后,后端Java应用就允许来自"http://localhost:8085"域的跨域请求了。
如果你使用的是Spring Security来保护你的后端Java应用的API,你还需要配置Spring Security以允许跨域请求。在你的Spring Security配置文件中,添加如下的配置:
import org.springframework.context.annotation.Configuration;
import org.springframework.security.config.annotation.web.builders.HttpSecurity;
import org.springframework.security.config.annotation.web.configuration.EnableWebSecurity;
import org.springframework.security.config.annotation.web.configuration.WebSecurityConfigurerAdapter;

@Configuration
@EnableWebSecurity
public class SecurityConfig extends WebSecurityConfigurerAdapter {

    @Override
    protected void configure(HttpSecurity http) throws Exception {
        http.cors().and().csrf().disable();
    }
}
这个配置将启用跨域资源共享(CORS)并禁用跨站请求伪造(CSRF)保护。
注意:在生产环境中,你可能需要根据实际需求设置更严格的CORS策略,例如限制允许访问的域名。同时,要确保在开发环境中配置CORS时仅允许来自预期来源的请求,以保护你的应用安全。
希望这些步骤能帮助你解决Vue访问后端Java时的CORS问题。
参考GPT:
在给定的代码中,你已经在SecurityConfig类中配置了跨域设置。在理论上,这样应该足够启用跨域请求。如果跨域配置不生效,可能有以下几个原因:
配置顺序问题:请确保
SecurityConfig类上没有其他@Order或类似的注解,以确保该类的配置优先级正确。默认情况下,SecurityConfig的优先级应该足够高,但最好再确认一下。其他地方的配置冲突:如果项目中有其他地方配置了跨域,可能会导致冲突。请检查其他配置文件或类,确认是否有其他地方设置了跨域相关的配置。
请求没有进入到该配置:可能你的请求没有进入到
SecurityConfig配置中,这可能是因为其他过滤器或拦截器在SecurityConfig之前拦截了请求。你可以在SecurityConfig中加入一些日志来确认请求是否被正确地拦截和处理。缓存问题:有时候浏览器会对CORS进行缓存,导致配置不生效。你可以尝试在请求时使用隐私模式或清除浏览器缓存,再次测试跨域是否生效。
如果上述检查都没有问题,但跨域配置仍然不生效,可能需要更详细地检查代码和项目配置。你可以查看控制台输出、日志文件或使用开发者工具查看网络请求来获取更多的信息,帮助定位问题所在。
yml配置有一种办法, 还有一种就是你那种,看看对应版本的文档吧
这里有一篇不错的博客,讲解清晰,不妨试试看能否解决问题。https://blog.csdn.net/weixin_39255905/article/details/124341670
https://www.cnblogs.com/guozhiqiang/p/16902863.html
Spring Security 是基于 Spring 框架的安全框架,主要用于企业级 Web 应用程序的身份验证和授权。在现代的 Web 应用程序中,跨域资源共享(CORS)是一项极其重要的安全特性,用于限制来自其他域的 HTTP 请求,以防止跨站点请求伪造攻击(CSRF)与其他安全漏洞。在使用 Spring Security 进行开发时,我们需要配置跨域支持,以确保安全性。
在新版 Spring Security 中,跨域配置已经更新,以支持更灵活的跨域解决方案。我们可以使用CorsConfigurationSource和CorsConfiguration来配置跨域支持。
首先,在 Spring Security 配置文件中,我们需要注入CorsConfigurationSource接口的实现类。这个接口的实现类将提供所有的 CORS 配置信息。例如,我们可以使用以下代码来创建一个实现类:
@Bean
public CorsConfigurationSource corsConfigurationSource() {
    CorsConfiguration configuration = new CorsConfiguration();
    configuration.setAllowedOrigins(Arrays.asList("*"));
    configuration.setAllowedMethods(Arrays.asList("*"));
    configuration.setAllowedHeaders(Arrays.asList("*"));
    configuration.setExposedHeaders(Arrays.asList("Content-Disposition, Content-Length, Content-Type, X-Total-Count, Authorization"));
    UrlBasedCorsConfigurationSource source = new UrlBasedCorsConfigurationSource();
    source.registerCorsConfiguration("/**", configuration);
    return source;
}
在这个例子中,我们创建了一个CorsConfiguration对象,并设置了一系列的允许选项:允许所有源(*)、所有方法(*)和所有标头(*),以及公开的标头。我们还使用UrlBasedCorsConfigurationSource创建了一个配置源,并将其注册到所有 URL。
一旦我们创建了 CORS 配置,我们就需要在 Spring Security 配置文件中将其应用到我们的 Web 应用程序中。为此,我们需要创建一个过滤器,将我们的 CORS 配置包装在其中。以下是一个简单的过滤器类的例子:
public class CorsFilter extends OncePerRequestFilter {
    private final CorsConfigurationSource corsConfigurationSource;

    public CorsFilter(CorsConfigurationSource corsConfigurationSource) {
        this.corsConfigurationSource = corsConfigurationSource;
    }

    @Override
    protected void doFilterInternal(HttpServletRequest request, HttpServletResponse response, FilterChain filterChain) throws ServletException, IOException {
        CorsConfiguration corsConfiguration = corsConfigurationSource.getCorsConfiguration(request);
        if (corsConfiguration != null) {
            CorsProcessor corsProcessor = new DefaultCorsProcessor();
            corsProcessor.processRequest(corsConfiguration, request, response);
        }
        if (!"OPTIONS".equals(request.getMethod())) {
            filterChain.doFilter(request, response);
        }
    }
}
在这个过滤器中,我们使用我们的CorsConfigurationSource对象获取请求的CorsConfiguration,并使用DefaultCorsProcessor处理请求。最后,我们使用filterChain将请求传递给下一个过滤器。
最后,我们需要将我们的过滤器配置到 Spring Security 中。我们可以使用以下代码实现:
@Configuration
public class SecurityConfig extends WebSecurityConfigurerAdapter {
    private final CorsConfigurationSource corsConfigurationSource;

    public SecurityConfig(CorsConfigurationSource corsConfigurationSource) {
        this.corsConfigurationSource = corsConfigurationSource;
    }

    @Override
    protected void configure(HttpSecurity http) throws Exception {
        http.cors().and().authorizeRequests()
                .antMatchers("/api/**").authenticated()
                .and().addFilterBefore(new CorsFilter(corsConfigurationSource), ChannelProcessingFilter.class)
                .csrf().disable().headers().frameOptions().disable();
    }
}
在这个例子中,我们使用了.cors()方法将我们的 CORS 配置应用到 Spring Security 中,并使用.addFilterBefore()方法将我们的过滤器添加到通道处理过滤器之前。
总的来说,以上代码展示了如何在新版 Spring Security 中配置跨域支持。我们需要创建一个 CORS 配置源,并使用过滤器将其应用到 Web 应用程序中。使用这种方法,我们可以轻松地保护我们的 Web 应用程序免受跨站点攻击,同时保持网站的易用性和可访问性。
引言
在前后端分离的开发模式下,由于前端代码和后端代码分别部署在不同的服务器上,因此跨域访问就成为了一个常见的问题。在Spring Security中,我们也需要进行相应的配置才能支持跨域访问。本文将详细介绍如何在新版的Spring Security中配置跨域,以及如何处理跨域访问时的问题。
一、Spring Security新版中的跨域配置
在新版的Spring Security中,我们可以通过使用CorsConfigurationSource来配置跨域访问。CorsConfigurationSource是一个接口,它定义了对跨域访问的配置,包括允许哪些域名访问、允许哪些HTTP方法、允许哪些请求头等等。
在实际使用中,我们需要定义一个CorsConfigurationSource的实现类,并在Spring Security的配置类中将其注入。下面是一个示例:
@Configuration
@EnableWebSecurity
public class SecurityConfig extends WebSecurityConfigurerAdapter {

    @Override
    protected void configure(HttpSecurity http) throws Exception {
        http.csrf().disable()
            .cors()
            .and()
            .authorizeRequests()
            .antMatchers("/api/**").authenticated()
            .anyRequest().permitAll();
    }

    @Bean
    public CorsConfigurationSource corsConfigurationSource() {
        CorsConfiguration configuration = new CorsConfiguration();
        configuration.setAllowedOrigins(Arrays.asList("http://localhost:8080"));
        configuration.setAllowedMethods(Arrays.asList("GET", "POST", "PUT", "DELETE"));
        configuration.setAllowedHeaders(Arrays.asList("Authorization", "Content-Type"));

        UrlBasedCorsConfigurationSource source = new UrlBasedCorsConfigurationSource();
        source.registerCorsConfiguration("/**", configuration);

        return source;
    }
}
在上面的代码中,我们首先禁用了CSRF防护,然后通过cors()方法启用了跨域访问。在cors()方法之后,我们还可以使用exposedHeaders()方法,来设置允许客户端访问的响应头。
在corsConfigurationSource()方法中,我们定义了允许的域名、HTTP方法和请求头。这里我们只允许了来自“http://localhost:8080”的跨域请求。如果要允许所有域名的请求,可以使用通配符“*”。
二、跨域访问时的问题和解决方案
在实际开发中,我们可能会遇到一些跨域访问时的问题,比如:
跨域请求发送成功,但是响应头中的跨域相关字段(比如Access-Control-Allow-Origin)未被服务器正确设置,导致请求失败。
跨域请求发送成功,但是服务器返回的响应没有包含预期的数据,导致前端页面无法正确渲染。
为了解决这些问题,我们可以采取以下措施:
在服务器端正确设置响应头中的跨域相关字段。在Spring Security中,我们可以通过使用CorsConfigurationSource来设置这些字段。
在前端代码中使用XMLHttpRequest对象来发送跨域请求,并且在发送请求时设置withCredentials属性为true。这样可以保证在跨域请求中携带用户的身份凭证(比如cookie)。
在服务器端正确处理跨域请求,并在响应中包含预期的数据。如果服务器返回的数据需要进行一些转换,比如转换为JSON格式,我们可以使用相应的工具类来完成这项工作。
总结
本文介绍了如何在新版的Spring Security中配置跨域访问,以及如何处理在跨域访问时可能遇到的问题。在实际开发中,我们应该根据具体的需求来进行相应的配置,保证系统的安全性和稳定性。
请确保前端应用程序在请求时发送了适当的权限标头(例如,Access-Control-Allow-Origin)。
请检查CORS配置是否正确。在代码中,使用了@Bean注解来创建了一个CorsConfigurationSource bean,并设置了允许的所有来源、方法和标头。这种配置方法适用于所有URL路径,但在较新的Spring Security版本中,它可能不起作用。可以尝试使用@PostMapping注解或类似的方式来明确指定允许的来源。
例如,可以尝试将以下代码添加到您的配置类中:
@Bean
public WebMvcConfigurer corsConfigurer() {
    return new WebMvcConfigurerAdapter() {
        @Override
        public void addCorsMappings(CorsRegistry registry) {
            registry.addMapping("/**")
                    .allowedOrigins("*")
                    .allowedMethods("*")
                    .allowedHeaders("*")
                    .maxAge(3600);
        }
    };
}
参考newbing
在使用Spring Boot和Vue.js时,配置Spring Security进行跨域请求可能会遇到一些问题。以下是一些可能导致配置无效的常见原因:
配置顺序问题:确保您的跨域配置位于Spring Security配置的前面。这样可以确保跨域配置在Spring Security之前生效。例如,在Spring Boot中,可以使用
WebMvcConfigurer来配置跨域,确保在Spring Security配置类之前执行。确保跨域配置正确:在跨域配置中,确保允许的请求来源、请求方法和其他跨域相关的配置是正确的。例如,可以使用
CorsConfiguration类或@CrossOrigin注解来配置跨域。禁用Spring Security的CSRF保护:如果您启用了Spring Security的CSRF保护功能,可能会导致跨域请求被拦截。您可以尝试禁用CSRF保护,或者在配置中排除特定的URL或请求方法。
配置是否生效:确保您的配置生效并被正确加载。您可以在应用程序启动时查看控制台日志,以确保配置被正确加载。
添加@CrossOrigin 注解