打包出现错误,该如何解决!
给文件打包,但是运行不了!
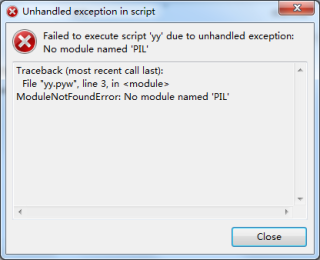
把文件格式改成pyw,显示
请问我下面的程序该如何打包! 或者有没有详细的打包教程!
from tkinter import *  # 引入tkinter库
from tkinter import filedialog
from PIL import Image  # 引入PIL库的Imgae子模块
from PIL import ImageTk  # 引入PIL库的ImageTk子模块
import qrcode  # 引入qrcode库


def create_qrcode(text, filename):
    """
    生成二维码图片
    """
    qr = qrcode.QRCode(
        version=None,
        error_correction=qrcode.ERROR_CORRECT_H,
        box_size=5,
        border=1
    )
    qr.make(fit=True)
    qr.add_data(text)
    # fill_color和back_color参数改变生成图片的格子颜色和背景颜色
    img = qr.make_image(fill_color="Tan", back_color="white")
    img.save(filename + '.png')

def save_qr():
    # 获取文本框内的内容
    text_input = t.get(0.0, "end")
    # print(text_input)
    if text_input == '\n':
        text_input = 'http://www.baidu.com'
    # 定义图片的名字为输入内容的第一个字符
    img_name = filedialog.asksaveasfilename()
    # print(img_name)
    # 生成二维码图片
    create_qrcode(text_input, img_name)

def callback():
    # 获取文本框内的内容
    text_input = t.get(0.0, "end")
    if text_input == '\n':
        text_input = 'http://www.baidu.com'
    # 定义图片的名字为输入内容的第一个字符
    img_name = text_input[0:1]
    # 生成二维码图片
    create_qrcode(text_input, img_name)
    # 保存二维码图片至本地
    img = Image.open(img_name + '.png')
    # 设定图片大小
    size = (320, 320)
    if var.get() == "A":
        size = (320, 320)
    elif var.get() == "B":
        size = (200, 200)
    else:
        size = (160, 160)


    img = img.resize(size)
    # 重新在窗体中显示新生成的二维码图片,覆盖刚才的图片
    img = ImageTk.PhotoImage(img)
    label.configure(image=img)
    label.image = img

def print_selection():
    print( 'u have select:' + var.get())

if __name__ == "__main__":
    root = Tk()  # 新建窗口
    root.geometry("800x600")  # 窗口大小
    root.resizable(False, False)  # 禁止改变窗口大小
    root.title('二维码生成器')  # 窗口标题
    img = qrcode.make('https://www.baidu.com')  # 将这个网站转换为二维码图片
    img.save('d:\\hello.png')  # 保存二维码图片到本地
    img = Image.open('d:\\hello.png')  # 打开本地二维码图片
    img = ImageTk.PhotoImage(img)  # 根据本地图片生成窗体图片

    infoimg = Image.open('d:\\6666.png')
    img_show = ImageTk.PhotoImage(infoimg)
    img_label = Label(root, image=img_show, width=380, height=60)  # 图片
    img_label.place(x=16, y=20)  #

    lbl = Label(root, text='图像\n大小', font=("黑体", 12), width=5, height=10, foreground='black')  # 名称标签,前景色设红色
    lbl.place(x=430, y=410)  # 文字位置


    t = Text(root, width=36, height=21, font=("黑体", 14))  # 在窗体嵌入输入框
    t.place(x=30, y=110)  # 输入框的位置


    btn1 = Button(root, text='点我生成二维码', width=20, font=("黑体", 14), command=callback)  # 按钮,按钮相应函数 callback
    btn1.place(x=100, y=540)  # 按钮位置

    btn2 = Button(root, text='保存', width=20, font=("黑体", 14), command=save_qr)  # 按钮2
    btn2.place(x=480, y=540)  # 按钮位置

    label = Label(root, image=img, width=380, height=400)  # 嵌入二维码图片
    label.place(x=400, y=70)  # 二维码图片位置

    var = StringVar()
    r1 = Radiobutton(root, text='大', variable=var, value='A', command=print_selection)
    r1.place(x=510, y=480)
    r2 = Radiobutton(root, text='中', variable=var, value='B', command=print_selection)
    r2.place(x=610, y=480)
    r3 = Radiobutton(root, text='小', variable=var, value='C', command=print_selection)
    r3.place(x=710, y=480)
    var.set("A")

    root.mainloop()
用到 PIL 库,挺复杂
https://www.jb51.net/article/140911.htm
另外,如果要用pyinstaller 打包, 所有的 from xxx import yyy
建议都加一句
import xxx
不然,有的时候会提示这个模块不存在。
建议你看看这个
https://blog.csdn.net/Itsme_MrJJ/article/details/115697711
用pyinstaller打包
如果你的工程本身是多文件的,那你应该打包文件夹,而不是打包成一个单独的exe,尤其是你后台还有配置文件的时候
另:所有你引用的第三方类库,只要它不是纯python脚本,后台肯定要有dll或so文件,你要么把它放到工程目录主文件下面,要么放到系统默认类库函数目录里面,要么把安装路径设置成环境变量,否则找不到。
用命令打包就是。很简单,还方便。Ctrl+R ->打开cmd->然后cd 你的项目路径文件夹-> 执行 jar -cvf 起个名.jar ./*
我这里有个简单方法,把-F选项去掉,也许可以把这个模块包含上。
把代码调整一下,避免 tkinter 里的 Image
和 PIL里的 Image重复
我本机可以顺利用 pyintaller -F -w 打包
import tkinter
import PIL
from tkinter import *  # 引入tkinter库
from tkinter import filedialog
from PIL import Image as Image_PIL  # 引入PIL库的Imgae子模块
from PIL import ImageTk  # 引入PIL库的ImageTk子模块
import qrcode  # 引入qrcode库


def create_qrcode(text, filename):
    """
    生成二维码图片
    """
    qr = qrcode.QRCode(
        version=None,
        error_correction=qrcode.ERROR_CORRECT_H,
        box_size=5,
        border=1
    )
    qr.make(fit=True)
    qr.add_data(text)
    # fill_color和back_color参数改变生成图片的格子颜色和背景颜色
    img = qr.make_image(fill_color="Tan", back_color="white")
    img.save(filename + '.png')


def save_qr():
    # 获取文本框内的内容
    text_input = t.get(0.0, "end")
    # print(text_input)
    if text_input == '\n':
        text_input = 'http://www.baidu.com'
    # 定义图片的名字为输入内容的第一个字符
    img_name = filedialog.asksaveasfilename()
    # print(img_name)
    # 生成二维码图片
    create_qrcode(text_input, img_name)


def callback():
    # 获取文本框内的内容
    text_input = t.get(0.0, "end")
    if text_input == '\n':
        text_input = 'http://www.baidu.com'
    # 定义图片的名字为输入内容的第一个字符
    img_name = text_input[0:1]
    # 生成二维码图片
    create_qrcode(text_input, img_name)
    # 保存二维码图片至本地
    img = Image.open(img_name + '.png')
    # 设定图片大小
    size = (320, 320)
    if var.get() == "A":
        size = (320, 320)
    elif var.get() == "B":
        size = (200, 200)
    else:
        size = (160, 160)

    img = img.resize(size)
    # 重新在窗体中显示新生成的二维码图片,覆盖刚才的图片
    img = ImageTk.PhotoImage(img)
    label.configure(image=img)
    label.image = img


def print_selection():
    print('u have select:' + var.get())


if __name__ == "__main__":
    root = Tk()  # 新建窗口
    root.geometry("800x600")  # 窗口大小
    root.resizable(False, False)  # 禁止改变窗口大小
    root.title('二维码生成器')  # 窗口标题
    img = qrcode.make('https://www.baidu.com')  # 将这个网站转换为二维码图片
    img.save('d:\\hello.png')  # 保存二维码图片到本地
    img = Image_PIL.open('d:\\hello.png')  # 打开本地二维码图片
    img = ImageTk.PhotoImage(img)  # 根据本地图片生成窗体图片

    infoimg = Image_PIL.open('d:\\6666.png')
    img_show = ImageTk.PhotoImage(infoimg)
    img_label = Label(root, image=img_show, width=380, height=60)  # 图片
    img_label.place(x=16, y=20)  #

    lbl = Label(root, text='图像\n大小', font=("黑体", 12), width=5, height=10, foreground='black')  # 名称标签,前景色设红色
    lbl.place(x=430, y=410)  # 文字位置

    t = Text(root, width=36, height=21, font=("黑体", 14))  # 在窗体嵌入输入框
    t.place(x=30, y=110)  # 输入框的位置

    btn1 = Button(root, text='点我生成二维码', width=20, font=("黑体", 14), command=callback)  # 按钮,按钮相应函数 callback
    btn1.place(x=100, y=540)  # 按钮位置

    btn2 = Button(root, text='保存', width=20, font=("黑体", 14), command=save_qr)  # 按钮2
    btn2.place(x=480, y=540)  # 按钮位置

    label = Label(root, image=img, width=380, height=400)  # 嵌入二维码图片
    label.place(x=400, y=70)  # 二维码图片位置

    var = StringVar()
    r1 = Radiobutton(root, text='大', variable=var, value='A', command=print_selection)
    r1.place(x=510, y=480)
    r2 = Radiobutton(root, text='中', variable=var, value='B', command=print_selection)
    r2.place(x=610, y=480)
    r3 = Radiobutton(root, text='小', variable=var, value='C', command=print_selection)
    r3.place(x=710, y=480)
    var.set("A")

    root.mainloop()