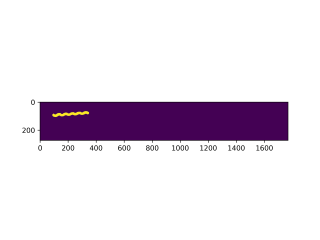
怎么求图中黄线的宽度
如图,不是长度,是宽度,第二个图划红线的距离
matlab和python都可以,matlab更好
感谢!

引用chatgpt部分指引作答:
运行结果如下:

以下是一个完整的MATLAB代码示例,用于求解图像中黄线的宽度:
% 读取图像
image = imread('your_image_path'); % 替换为你的图像路径

% 显示原始图像
figure;
subplot(1, 3, 1);
imshow(image);
title('原始图像');

% 提取黄色线条
yellowLine = image(:,:,1) > 200 & image(:,:,2) > 200 & image(:,:,3) < 100;

% 显示提取的黄色线条
subplot(1, 3, 2);
imshow(yellowLine);
title('提取的黄色线条');

% 检测黄线的边缘
yellowEdge = edge(yellowLine, 'Canny');

% 显示黄线的边缘
subplot(1, 3, 3);
imshow(yellowEdge);
title('黄线边缘');

% 计算黄线宽度
yellowStats = regionprops(yellowEdge, 'BoundingBox');
yellowWidth = yellowStats.BoundingBox(3);

disp(['黄线宽度为:', num2str(yellowWidth)]);
换代码中的your_image_path为你实际图像的路径。运行代码后,你将会看到一个窗口,其中包含原始图像、提取的黄色线条和黄线的边缘图像。控制台输出将显示黄线的宽度。
在Matlab中,您可以使用“LineWidth”属性来设置绘图中线条的宽度。例如,以下代码可以绘制一个线宽为2的红色线段:
Copy
x = [0 1];
y = [0 1];
plot(x, y, 'r', 'LineWidth', 2);
在Python中,您可以使用“linewidth”参数或“set_linewidth()”方法来设置线条的宽度。例如,以下代码可以绘制一个线宽为2的红色线段:
Copy
import matplotlib.pyplot as plt
x = [0, 1]
y = [0, 1]
plt.plot(x, y, 'r', linewidth=2)
plt.show()
请注意,Matlab和Python中的线宽度参数是以像素为单位的,并且在不同的绘图库和设备上可能有所不同。因此,您可能需要进行一些试验来找到适合您需求的最佳线条宽度。
宽度有参考值吗?
还请给一下 你生成这个图的代码 。
% 线段两个端点的坐标
x1 = 1;
y1 = 2;
x2 = 4;
y2 = 6;

% 计算线段斜率和截距
k_line = (y2 - y1) / (x2 - x1);
b_line = y1 - k_line * x1;

% 计算垂线斜率
k_perp = -1 / k_line;

% 计算线段中点坐标
x_mid = (x1 + x2) / 2;
y_mid = (y1 + y2) / 2;

% 计算垂线方程
b_perp = y_mid - k_perp * x_mid;

% 线段两侧的点坐标
x_left = 2;
y_left = 3;
x_right = 3;
y_right = 5;

% 计算点到垂线的距离
dist_left = abs(k_perp * x_left - y_left + b_perp) / sqrt(k_perp^2 + 1);
dist_right = abs(k_perp * x_right - y_right + b_perp) / sqrt(k_perp^2 + 1);

% 计算线段的宽度
width = dist_left + dist_right;
可以通过黄线显示中垂直方向的像素数来推算出线宽,mathlab不清楚,python肯定是可以的
您可以使用Matlab中的 improfile 函数来获取线段上的像素值,然后在像素值中找到第一个大于阈值的位置,该位置就是图像中的宽度。以下是一个示例代码:
```bash
img = imread('your_image_path.jpg');
 % 定义线段起点和终点
x1 = 50;
y1 = 50;
x2 = size(img, 2) - 50;
y2 = size(img, 1) - 50;
 % 获取线段上的像素值
[profile, ~] = improfile(img, [x1 x2], [y1 y2]);
 % 定义阈值并找到第一个大于阈值的位置
threshold = 100;
idx = find(profile>threshold, 1);
 % 计算宽度
width = norm([x1 y1] - [x2 y2]) * idx / length(profile);
```
def find_lines(image_file, threshold, min_line_width):

im = Image.open(image_file)

width, height = im.size

hist = []

lines = []

start = end = 0

for x in xrange(width):

column = im.crop((x, 0, x + 1, height))

stat = ImageStat.Stat(column)

## normalises by 2 * 255 as in your example the colour is yellow

## if your images start using white lines change this to 3 * 255

hist.append(sum(stat.sum) / (height * 2 * 255))

for index, value in enumerate(hist):

if value > threshold and end >= start:

start = index

if value < threshold and end < start:

if index - start < min_line_width:

start = 0

else:

end = index

center = start + (end - start) / 2.0

width = end - start

lines.append((start, end, center, width))

return lines

def find_closest_band_width(x_position, lines):

distances = [((value[2] - x_position) ** 2) for value in lines]

index = distances.index(min(distances))

return lines[index][3]

## set your threshold, and min_line_width for finding lines

lines = find_lines("8IxWA_sample.png", 0.7, 4)

## sets x_position to 59th pixel

print 'width of nearest line:', find_closest_band_width(59, lines)
A: 针对黄线宽度的测量问题,可以尝试以下步骤:
- 读取图片并将其转换为灰度图像
img = imread('your_image.jpg'); % 读取图片
gray_img = rgb2gray(img); % 转换为灰度图像
- 对灰度图像进行二值化处理,将黄线区域设为白色,其余区域设为黑色
BW_img = gray_img>200; % 将灰度值大于200的区域设为白色
- 使用 regionprops 函数获取连通域信息,再筛选出与黄线面积大小相近的连通域
stats = regionprops(BW_img, 'Area', 'Centroid'); % 获取连通域信息
area_list = [stats.Area];
target_idx = find(abs(area_list - target_area) < threshold); % 找到与黄线面积大小相近的连通域
- 对 target_idx 中的连通域进行形态学操作,以进一步提取黄线的几何特征(如边缘、宽度等)
se = strel('line',width,length); % 构造矩形结构元素
edge_img = edge(imdilate(BW_img(target_idx), se), 'canny'); % 对连通域进行形态学操作,并使用 canny 函数提取边缘信息
width_list = sum(edge_img, 1); % 计算每一列中白色像素的个数,即黄线宽度
- 对第二幅图中红线所划距离处进行类似的宽度测量
dist = 100; % 第二幅图中红线所划距离(假设为100像素)
ROI_img = BW_img(:,(dist-width/2):(dist+width/2)); % 提取感兴趣区域
width_list = sum(ROI_img, 1); % 计算每一列中白色像素的个数,即黄线宽度
完整的代码如下:
img = imread('your_image.jpg');
gray_img = rgb2gray(img);
BW_img = gray_img>200;

target_area = 1000; % 黄线面积(根据实际情况设定)
threshold = 100; % 与黄线面积大小相差小于 threshold 的连通域被认为是黄线
stats = regionprops(BW_img, 'Area', 'Centroid');
area_list = [stats.Area];
target_idx = find(abs(area_list - target_area) < threshold);

se = strel('line',width,length);
edge_img = edge(imdilate(BW_img(target_idx), se), 'canny');
width_list = sum(edge_img, 1);

dist = 100; % 第二幅图中红线所划距离(假设为100像素)
ROI_img = BW_img(:,(dist-width/2):(dist+width/2));
width_list = sum(ROI_img, 1);
其中,width 和 length 分别为矩形结构元素的宽度和长度,需要根据实际情况进行设定。如果黄线在图像中的情况较为复杂,可以考虑使用更高级的图像处理方法,如基于深度学习的物体检测等。
下面是获取宽度的MATLAB代码:
% 读入图像
im = imread('image.png');

% 将图像转化为灰度图像
im_gray = rgb2gray(im);

% 对图像进行边缘检测,提取出曲线的边缘
im_edge = edge(im_gray, 'Canny', [0.05 0.1]);

% 提取出曲线边缘
bw = bwperim(im_edge);

% 计算距离变换
D = bwdist(bw);

% 取出距离变换的最大值
Dmax = max(D(:));

% 根据距离变换计算宽度
width = 2 * sum(D(:) == Dmax);

% 显示结果
imshow(im); hold on;
visboundaries(bw, 'Color', 'y', 'LineWidth', width);