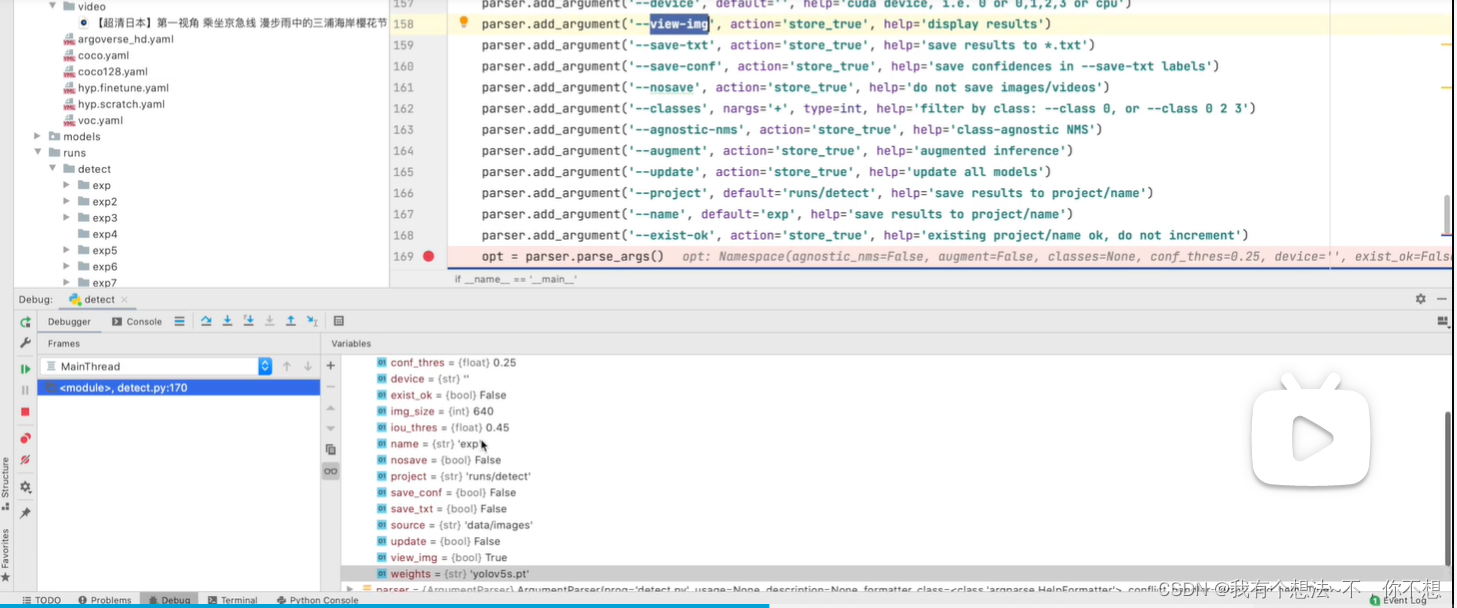
yolov5运行detect 过程中的报错一直无法解决
在运行detect文件的时候一直出现这个报错 试过许多办法无法解决 是初学者 对于许多编程知识不太了解


- 这个问题的回答你可以参考下: https://ask.csdn.net/questions/7788589
- 这篇博客你也可以参考下:yolov5检测图片用detect.py
- 除此之外, 这篇博客: yolov5 detect文件参数解释(部分)中的 detect.py中参数解释 部分也许能够解决你的问题, 你可以仔细阅读以下内容或跳转源博客中阅读:
default默认值
def parse_opt():
parser = argparse.ArgumentParser()
parser.add_argument(’–weights’, nargs=’+’, type=str, default=ROOT / ‘yolov5s.pt’, help=‘model path(s)’)
parser.add_argument(’–source’, type=str, default=ROOT / ‘data/images’, help=‘file/dir/URL/glob, 0 for webcam’)
parser.add_argument(’–imgsz’, ‘–img’, ‘–img-size’, nargs=’+’, type=int, default=[640], help=‘inference size h,w’)
parser.add_argument(’–conf-thres’, type=float, default=0.25, help=‘confidence threshold’)
#conf-thres表示置信度,default=0.25当有超过25%的可能时,显示预测框
parser.add_argument(’–iou-thres’, type=float, default=0.45, help=‘NMS IoU threshold’)
#iou-thres表示交并比,控制单个目标框的多少,default=0.45表示iou小于该阈值时当作两个框处理,default=1框与框完全重合才能合并,结果中会有多个框出现。default=0表示只要框与框有交集部分就可以合并,故结果中没有重合的框。
parser.add_argument(’–max-det’, type=int, default=1000, help=‘maximum detections per image’)
parser.add_argument(’–device’, default=’’, help=‘cuda device, i.e. 0 or 0,1,2,3 or cpu’)#设备
parser.add_argument(’–view-img’, action=‘store_true’, help=‘show results’)
#弹出显示结果,具体操作如下
parser.add_argument(’–save-txt’, action=‘store_true’, help=‘save results to *.txt’)
#保存txt格式的结果
parser.add_argument(’–save-conf’, action=‘store_true’, help=‘save confidences in --save-txt labels’)#保存置信度txt
parser.add_argument(’–save-crop’, action=‘store_true’, help=‘save cropped prediction boxes’)
parser.add_argument(’–nosave’, action=‘store_true’, help=‘do not save images/videos’)#不保存
parser.add_argument(’–classes’, nargs=’+’, type=int, help=‘filter by class: --classes 0, or --classes 0 2 3’)
#指定预测结果只显示person标签或balabala
parser.add_argument(’–agnostic-nms’, action=‘store_true’, help=‘class-agnostic NMS’)
parser.add_argument(’–augment’, action=‘store_true’, help=‘augmented inference’)#增强(效果不明显)
parser.add_argument(’–visualize’, action=‘store_true’, help=‘visualize features’)
parser.add_argument(’–update’, action=‘store_true’, help=‘update all models’)
parser.add_argument(’–project’, default=ROOT / ‘runs/detect’, help=‘save results to project/name’)#结果保存位置
parser.add_argument(’–name’, default=‘exp’, help=‘save results to project/name’)#保存结果文件名
parser.add_argument(’–exist-ok’, action=‘store_true’, help=‘existing project/name ok, do not increment’)
#如果设置这个参数,exp文件夹不会增加结果保存在指定(exp)文件夹下
parser.add_argument(’–line-thickness’, default=3, type=int, help=‘bounding box thickness (pixels)’)
parser.add_argument(’–hide-labels’, default=False, action=‘store_true’, help=‘hide labels’)
parser.add_argument(’–hide-conf’, default=False, action=‘store_true’, help=‘hide confidences’)
parser.add_argument(’–half’, action=‘store_true’, help=‘use FP16 half-precision inference’)
parser.add_argument(’–dnn’, action=‘store_true’, help=‘use OpenCV DNN for ONNX inference’)
opt = parser.parse_args()
opt.imgsz *= 2 if len(opt.imgsz) == 1 else 1 # expand
print_args(FILE.stem, opt)
return opt补充:opt打断点可以看到参数状态
yolov5-5.0的版本如果我没记错的话,是需要pytorch1.7.0以上的版本才行吧,而且由于比较旧,也不能用太新的版本,应该是最好不要超过torch1.10还是1.11的版本。
另外还有一点比较重要的是,如果你是从其他版本切换到v5-5.0的版本,其中的pt文件是不能通用的,需要重新下载。一个是删除掉原来的文件,然后重新运行,会自动从github仓库下载,如果网络不好,可以copy一下控制台打印的下载地址,用浏览器或者迅雷下载到本地然后拷贝到项目下面。其中,如果自动下载模型失败,或者下载不完整,也会导致一些的问题。
以下内容参考ChatGPT模型:
很抱歉,由于您没有提供具体的代码和环境信息,我无法给出具体的解决方案。但是,根据您提供的报错信息,可以看出是模型加载的问题,可能是模型路径不正确或模型文件损坏等原因导致无法加载模型。您可以按照以下步骤进行排查:
确认模型路径是否正确,可以使用绝对路径或相对路径,建议使用绝对路径。
确认模型文件是否存在,可以使用文件管理器或命令行查看。
确认模型文件是否损坏,可以使用md5sum等工具计算文件的校验和,与官方提供的校验和进行对比。
确认模型文件是否与当前使用的pytorch版本兼容,如果不兼容可能需要重新训练模型或切换到对应版本的pytorch。
如果以上步骤都没有解决问题,建议提供更详细的信息,比如代码、环境、模型等,以便更好地帮助您解决问题。
以下答案由GPT-3.5大模型与博主波罗歌共同编写:
很抱歉,由于您没有提供更具体的错误信息,我无法知道您的问题是什么。您可以提供更多的上下文信息,以便我们对您的问题进行更详细的解答。
一般来说,运行 YOLOv5 中的 detect.py 文件出现错误,可能是以下原因之一:
1.模型权重文件路径不正确。
2.输入图片路径不正确。
3.缺少必要的库。
下面是一些可能有助于解决问题的建议:
1.确保您的模型权重文件和输入图片路径是正确的,可通过 print 语句等方式进行调试。
2.安装必要的库,如 pytorch、numpy、opencv-python 等。可以通过 pip install 命令进行安装。
3.检查您的环境和依赖项是否正确设置,确保您的环境符合 YOLOv5 的要求。最好是使用 anaconda 或虚拟环境。
以下是一些可能有用的调试代码:
1.在 detect.py 文件开头加入以下代码,获取错误信息并调试。
import traceback
try:
    # your detect code here
except Exception:
    print(traceback.format_exc())
2.尝试打印输入图片和模型权重文件路径,以确保它们的正确性。
print(f"Image path: {path}")
print(f"Model weights path: {weights}")
希望这些信息能对您有所帮助。如果您可以提供更具体的错误信息或其他上下文信息,我们可以为您提供更详细的帮助。
如果我的回答解决了您的问题,请采纳!
根据您提供的信息,我们可以看到报错信息是:ModuleNotFoundError: No module named 'cv2'. 这个错误表示您的Python环境中没有cv2这个模块。cv2是Python中OpenCV的一个库,它用于图像处理和计算机视觉任务。
解决这个问题的方法是安装cv2库。您可以使用以下命令在终端中安装:
pip install opencv-python
如果您在使用Anaconda,可以使用以下命令安装:
conda install -c conda-forge opencv
如果您已经安装了OpenCV并且还没有解决问题,则可能是指定Python解释器时出了问题。您可以在detect.py中添加以下行来指定要使用的解释器:
#!/usr/bin/env python3
或者,您可以尝试使用绝对路径来指定Python解释器,例如:
#!/usr/local/bin/python3
这应该解决您的问题。下面是一个可能适用的完整样本detect.py文件的代码:
#!/usr/bin/env python3

import argparse
import os
import os.path as osp
import platform
import shutil
import sys

import cv2
import torch
import torch.backends.cudnn as cudnn

sys.path.append(os.getcwd())
from models.experimental import attempt_load
from utils.datasets import LoadStreams, LoadImages
from utils.general import check_img_size, check_requirements, check_stride, \
    colorstr, is_ascii, non_max_suppression, scale_coords, set_logging, \
    check_file, strip_optimizer, xyxy2xywh
from utils.plots import Annotator, colors
from utils.torch_utils import select_device, time_sync

....
希望这能帮助您解决问题。
