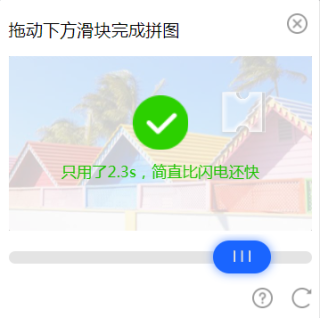
python+selenium处理腾讯滑动验证码,界面拖动和校验没问题,但是提交后提示“验证码校验失败”
有一个平台使用腾讯滑块验证码做登录校验,使用python + selenium + Chrome实现了界面拖动到缺口没问题,但是点击登录按钮后提示“验证码校验失败”【登录时发送了拖动腾讯滑块验证码后返回的ticket、randstr】,也就是腾讯滑块验证码校验失败了,应该是被检测到是使用selenium进行自动化操作的,所以ticket、randstr在腾讯后台校验不通过。

特别说明:
1、已添加以下参数(所以回答添加以下参数的请飘过):
chrome_start = Options()
chrome_start.add_argument('--disable-gpu')
chrome_start.add_argument("--disable-extensions")
chrome_start.add_argument('--start-maximized')
chrome_start.add_experimental_option('excludeSwitches', ['enable-automation'])
chrome_start.add_experimental_option('useAutomationExtension', False)
chrome_start.add_argument("--disable-blink-features=AutomationControlled")
driver = webdriver.Chrome(executable_path="chromedriver.exe", options=chrome_start)
with open('stealth.min.js') as f:
    js = f.read()
driver.execute_cdp_cmd("Page.addScriptToEvaluateOnNewDocument", {
                            "source": js
                        })
2、在Windows7下90%情况下没问题,但是在Windows10下全部都有问题。Windows7和Windows10下安装的Python插件是完全一样的,所以不存在环境不一致的问题。
3、不能上传文件,stealth.min.js文件请到以下地址下载:https://github.com/requireCool/stealth.min.js
因为selenium 控制chrome 的时候 是有特征码的 你要手动把这些特征去掉 不然人家js验证一下,直接就识别出来了
解决方法:代码中添加:
import time
from selenium import webdriver
from selenium.webdriver import ActionChains
options = webdriver.ChromeOptions()
options.add_argument('--disable-blink-features=AutomationControlled')    #重点代码:去掉了webdriver痕迹
brow = webdriver.Chrome(chrome_options=options)
brow.get(url)
print("滑块")
action_chains = ActionChains(brow)
time.sleep(3)
print("h1")
slider1 = brow.find_element_by_xpath('//*[@id="nc_1_n1z"]')   #定位滑块
action_chains.drag_and_drop_by_offset(slider1, 280, 0).perform()  #开始滑块验证
可参考如下链接python+selenium+chrome 做滑动验证码 会被浏览器检测到使用的自动软件导致滑动验证失败_Wl_Zero_的博客-CSDN博客_selenium滑动验证每次都失败
代码方便发一下吗,
需要本地测试一下看下出现的问题,以及一步步排查下解决方法
如果手动滑动,是能验证通过的,对吗?
有可能太快了
除了qq 邮箱还有其他网址可以模拟的吗,我qq邮箱登录不弹出 滑窗
这个可以解决python+selenium处理腾讯滑动验证码,界面拖动和校验没问题,但是提交后提示“验证码校验失败”的问题
我看了朋友在回答下面的评论,是需要解决selenium的检测问题吧,我用的win10,这里我下载的是75.0.3770.90。
http://chromedriver.storage.googleapis.com/index.html去这下载
测试程序
#coding=gb2312
from selenium import webdriver
import re
if name == "main":
driver = webdriver.Chrome()
driver.maximize_window() #最大化浏览器
driver.get('http://trans.mglip.com/')
for i in range(100):
    elem = driver.find_element_by_id('inputCyrillic_ID')    #定位输入框
    elem.clear()    #清除输入框
    content = "юу байна"    #要翻译得内容

    elem.send_keys(content) #传递要翻译得内容
    driver.find_element_by_id('ButtonTran_ID').click()  #点击转换
    a = driver.page_source  #获取源码
    result = re.findall('<span id="outPutTraditonalM_ID" class="outputStyle">(.+?)</span>',a) #提取内容
    if result:
        print(result[0])
    else:
        result = 'error'
        print(result)
   简单测
#coding=gb2312
from selenium import webdriver
import re
if name == "main":
driver = webdriver.Chrome()
driver.maximize_window() #最大化浏览器
driver.get('http://trans.mglip.com/')
for i in range(100):
    elem = driver.find_element_by_id('inputCyrillic_ID')    #定位输入框
    elem.clear()    #清除输入框
    content = "юу байна"    #要翻译得内容

    elem.send_keys(content) #传递要翻译得内容
    driver.find_element_by_id('ButtonTran_ID').click()  #点击转换
    a = driver.page_source  #获取源码
    result = re.findall('<span id="outPutTraditonalM_ID" class="outputStyle">(.+?)</span>',a) #提取内容
    if result:
        print(result[0])
    else:
        result = 'error'
        print(result)
可以参考一下
from selenium importwebdriverfrom selenium.webdriver.support.ui import WebDriverWait #等待元素加载的

from selenium.webdriver.common.action_chains import ActionChains #拖拽

from selenium.webdriver.support importexpected_conditions as ECfrom selenium.common.exceptions importTimeoutException, NoSuchElementExceptionfrom selenium.webdriver.common.by importByfrom PIL importImageimportrequestsimportreimportrandomfrom io importBytesIOimporttimedefmerge_image(image_file,location_list):"""拼接图片"""im=Image.open(image_file)

im.save('code.jpg')

new_im= Image.new('RGB',(260,116))#把无序的图片 切成52张小图片

im_list_upper =[]

im_list_down=[]#print(location_list)

for location inlocation_list:#print(location['y'])

if location['y'] == -58: #上半边

im_list_upper.append(im.crop((abs(location['x']),58,abs(location['x'])+10,116)))if location['y'] == 0: #下半边

im_list_down.append(im.crop((abs(location['x']),0,abs(location['x'])+10,58)))

x_offset=0for im inim_list_upper:

new_im.paste(im,(x_offset,0))#把小图片放到 新的空白图片上

x_offset +=im.size[0]

x_offset=0for im inim_list_down:

new_im.paste(im,(x_offset,58))

x_offset+=im.size[0]#new_im.show()

returnnew_imdefget_image(driver,div_path):'''下载无序的图片 然后进行拼接 获得完整的图片

:param driver:

:param div_path:

:return:'''background_images=driver.find_elements_by_xpath(div_path)

location_list=[]for background_image inbackground_images:

location={}

result= re.findall('background-image: url"(.∗?)"; background-position: (.*?)px (.*?)px;',background_image.get_attribute('style'))#print(result)

location['x'] = int(result[0][1])

location['y'] = int(result[0][2])

image_url=result[0][0]

location_list.append(location)

image_url= image_url.replace('webp','jpg')#'替换url http://static.geetest.com/pictures/gt/579066de6/579066de6.webp'

image_result =requests.get(image_url).content

image_file= BytesIO(image_result) #是一张无序的图片

image =merge_image(image_file,location_list)returnimagedefget_track(distance):#初速度

v=0#单位时间为0.2s来统计轨迹,轨迹即0.2内的位移

t=0.2

#位移/轨迹列表,列表内的一个元素代表0.2s的位移

tracks=[]

tracks_back=[]#当前的位移

current=0#到达mid值开始减速

mid=distance * 7/8

print("distance",distance)globalrandom_int

random_int=8distance+= random_int #先滑过一点,最后再反着滑动回来

while current

a = random.randint(2,5) #加速运动

else:

a= -random.randint(2,5) #减速运动

#初速度

v0 =v#0.2秒时间内的位移

s = v0*t+0.5*a*(t**2)#当前的位置

current +=s#添加到轨迹列表

if round(s)>0:

tracks.append(round(s))else:

tracks_back.append(round(s))#速度已经达到v,该速度作为下次的初速度

v= v0+a*tprint("tracks:",tracks)print("tracks_back:",tracks_back)print("current:",current)#反着滑动到大概准确位置

tracks_back.append(distance-current)

tracks_back.extend([-2,-5,-8,])returntracks,tracks_backdefget_distance(image1,image2):'''拿到滑动验证码需要移动的距离

:param image1:没有缺口的图片对象

:param image2:带缺口的图片对象

:return:需要移动的距离'''

#print('size', image1.size)

threshold= 50

for i in range(0,image1.size[0]): #260

for j in range(0,image1.size[1]): #160

pixel1 =image1.getpixel((i,j))

pixel2=image2.getpixel((i,j))

res_R= abs(pixel1[0]-pixel2[0]) #计算RGB差

res_G = abs(pixel1[1] - pixel2[1]) #计算RGB差

res_B = abs(pixel1[2] - pixel2[2]) #计算RGB差

if res_R > threshold and res_G > threshold and res_B >threshold:return i #需要移动的距离

defmain_check_code(driver,element):"""拖动识别验证码

:param driver:

:param element:

:return:"""login_btn= driver.find_element_by_class_name('js-login')

login_btn.click()

element= WebDriverWait(driver, 30, 0.5).until(EC.element_to_be_clickable((By.CLASS_NAME, 'gt_guide_tip')))

slide_btn= driver.find_element_by_class_name('gt_guide_tip')

slide_btn.click()

image1= get_image(driver, '//div[@class="gt_cut_bg gt_show"]/div')

image2= get_image(driver, '//div[@class="gt_cut_fullbg gt_show"]/div')#图片上 缺口的位置的x坐标

#2 对比两张图片的所有RBG像素点,得到不一样像素点的x值,即要移动的距离

l =get_distance(image1, image2)print('l=',l)#3 获得移动轨迹

track_list =get_track(l)print('第一步,点击滑动按钮')

element= WebDriverWait(driver, 30, 0.5).until(EC.element_to_be_clickable((By.CLASS_NAME, 'gt_slider_knob')))

ActionChains(driver).click_and_hold(on_element=element).perform() #点击鼠标左键,按住不放

importtime

time.sleep(0.4)print('第二步,拖动元素')for track intrack_list[0]:

ActionChains(driver).move_by_offset(xoffset=track, yoffset=0).perform() #鼠标移动到距离当前位置(x,y)

#time.sleep(0.4)

for track in track_list[1]:

ActionChains(driver).move_by_offset(xoffset=track, yoffset=0).perform() #鼠标移动到距离当前位置(x,y)

time.sleep(0.1)importtime

time.sleep(0.6)#ActionChains(driver).move_by_offset(xoffset=2, yoffset=0).perform() # 鼠标移动到距离当前位置(x,y)

#ActionChains(driver).move_by_offset(xoffset=8, yoffset=0).perform() # 鼠标移动到距离当前位置(x,y)

#ActionChains(driver).move_by_offset(xoffset=2, yoffset=0).perform() # 鼠标移动到距离当前位置(x,y)

print('第三步,释放鼠标')

ActionChains(driver).release(on_element=element).perform()

time.sleep(1)defmain_check_slider(driver):"""检查滑动按钮是否加载

:param driver:

:return:"""

whileTrue:try:

driver.get('https://www.huxiu.com/')

element= WebDriverWait(driver, 30, 0.5).until(EC.element_to_be_clickable((By.CLASS_NAME, 'js-login')))ifelement:returnelementexceptTimeoutException as e:print('超时错误,继续')

time.sleep(5)if __name__ == '__main__':try:

count= 3 #最多识别3次

driver =webdriver.Chrome()while count >0:#等待滑动按钮加载完成

element =main_check_slider(driver)

main_check_code(driver,element)try:

success_element= (By.CSS_SELECTOR, '.gt_success')#得到成功标志

success_images = WebDriverWait(driver,3).until(EC.presence_of_element_located(success_element))ifsuccess_images:print('成功识别!!!!!!')

count=0importsys

sys.exit()exceptException as e:print('识别错误,继续')

count-= 1time.sleep(1)else:print('too many attempt check code')

exit('退出程序')finally:

driver.close()
这个参数试过没有
driver.execute_cdp_cmd("Page.addScriptToEvaluateOnNewDocument", {
  "source": """
    Object.defineProperty(navigator, 'webdriver', {
      get: () => undefined
    })
  """
})
问题源自win10网络自我保护功能,使Selenium的切入机制遇到安全阻碍。
解决方案如下:
1、打开QQ浏览器或者IE,点击工具,或使用快捷键Alt+x
2、在弹出的菜单中选择”Internet 选项“
3、在弹出的选项卡中,选择第二项"安全"
4、逐次点击上面的4个图标,然后全部去掉"启用保护模式"的勾
5、回到IE,再次进入Tools菜单,Zoom必须设置为100%
至此,OK。

显卡显示必须改为100%

方便分享一下是哪一个平台吗?